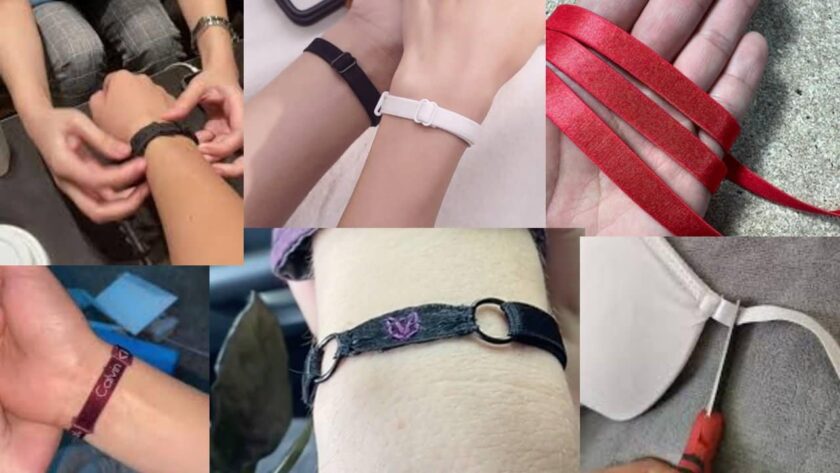
If you’re into crafting or love DIY fashion hacks, you might be surprised to learn you can turn an ordinary bra strap into a stylish bracelet. This upcycled accessory is not only creative but also a sustainable way to repurpose old lingerie. Whether you’re going for a minimalist look or something more decorative, here’s a step-by-step guide on how to make a bra strap bracelet—perfect for fashion lovers and DIYers alike.
What You’ll Need
Before you begin, gather the following materials:
- 1 bra strap (adjustable and removable ones work best)
- Scissors
- Needle and thread (or fabric glue for a no-sew option)
- Jewelry findings (optional: lobster clasp, jump rings, charm)
- Measuring tape or ruler
- Lighter (optional, for sealing edges)
- Small decorative items (like beads or rhinestones – optional)
Step-by-Step Instructions
Step 1: Choose the Right Bra Strap
Look for a removable bra strap with a hook on one end and an adjustable slider. This makes it easier to create a bracelet that fits well and looks polished. Choose a strap in a color or material you like—satin, lace, or elastic straps work great.
✅ Tip: If the strap isn’t removable, you can still cut it off carefully and reuse it.
Step 2: Measure Your Wrist
Wrap the strap around your wrist to check the length. Leave a little room for comfort, especially if you plan to add a clasp or decorative charm. Mark or remember the ideal length.
Step 3: Cut the Strap
Once you’ve measured, use sharp scissors to cut the strap to the desired length. Be sure to cut slightly longer if you’re planning to fold or sew the ends. If the material frays, you can carefully singe the edge with a lighter to seal it—just do it gently.
Step 4: Add Closures or Use the Existing Hooks
Option A: Use Existing Bra Hook
If the strap already has a hook and loop, you’re in luck! Simply loop the hook through the other end of the strap (you may need to sew a small fold to create a loop), and you have an instant bracelet.
Option B: Add a Jewelry Clasp
For a more customized look, sew or glue a lobster clasp on one end and a jump ring on the other. This adds a more jewelry-like finish.
✅ Tip: Use strong thread or fabric glue to keep the ends secure.
Step 5: Customize Your Bracelet (Optional)
Now that your basic bracelet is ready, it’s time to personalize it. You can:
- Sew or glue on beads, rhinestones, or lace
- Attach a small charm with a jump ring
- Add decorative stitching for a handmade look
- Use fabric paint or markers to create a pattern
This step is optional, but it’s what makes your bracelet unique.
Also Read: Why Do Bra Straps Keep Falling Down & How to Fix It
Step 6: Try It On and Adjust
Before wearing it out, try on your new bra strap bracelet and make sure it fits comfortably. Adjust the slider if needed. If it feels too loose or tight, tweak the closures or trim the strap again.
Why Try This DIY?
- ✅ Eco-friendly – repurposes old clothing items
- ✅ Budget-friendly – uses what you already have
- ✅ Customizable – fits your style and creativity
- ✅ Beginner-friendly – no advanced tools or skills needed
Final Thoughts
Learning how to make a bra strap bracelet is a fun and easy DIY project anyone can try at home. It’s a creative way to recycle, add flair to your accessory game, and even make personalized gifts. With just a few tools and a bit of imagination, your old bra strap can become a stylish statement piece.


